

26.6.13
Working on a new portfolio website. Just placeholder images just now, but I've got the layout sorted, including responsive design etc. so it will work on tablets, smartphones etc. pretty well. The first link works. Should hopefully have some decent content up in the next few days. Also, my shotgun model has some animations, courtesy of Sinistereffect and Theanimatedflame, including a compile for cs:s.

19.6.13


13.6.13


Album
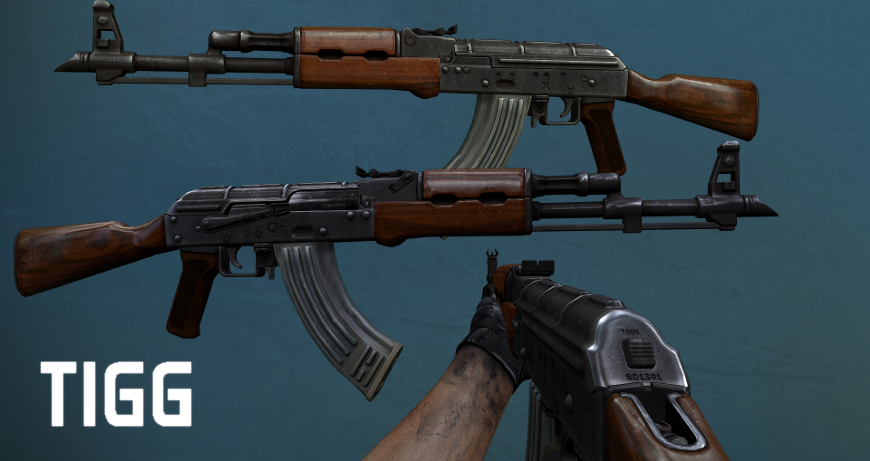
So, made the gloss map, and added some small details to the normal map. I added some bumpy varnish detail to the wood, as well as some woodgrain the the wee bits of exposed wood there, as well as bumping in some of the scratches. For the metal, I did the same kind of thing, but less pronounced. Usually I wouldn't put metal details in the normal map, but in this case it helps break up the smoothing errors brought on by the dimple in the lower receiver, although happily they're not particularly pronounced anyway. I wanted to add details to the wood because large, flat or gently curved surfaces like the stock don't tend to normal map that well (in my experience) because the gradients suffer quite badly from texture compression, even simply when saved as 8 bit .tga straight from xnormal, instead of saving to 16 bit .tif and converting to 8 bit later. Adding some small details to these areas helps to break up the gradients and force the compression to play nice with my texture.
This one still has the DDo textures on the magazine, so that's why the ddo logo is there. When I update those I'll update the render too.
Anyhoo, once this is out of the way I'm going to go back and finish up an environment I started a while ago. Really have to learn to finish things that I start.
12.6.13
 So I did this texture by hand in gimp, tonight. The mag is the old DDo texture. Ddo crashes too much to be useful for now. E.g, I had a texture for the whole asset made in Ddo, but some bug means that rendering the project doesn't respect the base texture you imported, meaning big chunks of the texture didn't render out.
I may re-uv to do mirroring in the UV's, I didn't do any because I wanted to use OS norms but that didn't work out, so I might just re-uv it and bake these textures to the new model.
Anyhoo, I tried not to go too crazy with the wear/dirt on this texture, whilst still making a bit "lived in". I like the close control I get making textures by hand, but I can see how DDo would come into play for less important props, or for getting a base to add to. If it was more stable and had a wider range of presets (wood being conspicuously missing) it might even work for hero assets.
Subscribe to:
Posts (Atom)